


Alright, fam, let’s get this done. Here’s the post, just like you asked:
Alright, look. Sometimes, when you building stuff online, you need folks to be able to pick where they at. Like, if they fillin’ out a form or signin’ up for somethin’, you gotta let ’em choose their country. Now, you *could* just make ’em type it in. But let’s be real, that’s a recipe for mess. Typos everywhere, different spellings, all that jazz. Ain’t nobody got time for that.


That’s where the country dropdown list comes in clutch. It’s a clean, simple way for people to pick their country from a pre-defined list. No muss, no fuss. And let me tell you, doin’ it right can make your website or app look way more professional and user-friendly. Plus, it cuts down on errors and makes your data way easier to manage. So, let’s dive into how you can make this happen.
Country Dropdown List in Javascript: Keepin’ it Simple

Now, for those of you who like to keep things light and quick, Javascript is your best friend here. We talkin’ pure client-side action. This means no need to hit the server just to get a list of countries. Keep everything running slick and smooth right in the user’s browser. Here’s how you might go about setting up this kinda situation.
First things first, you need that data. The list of countries. You can either hardcode it into your Javascript file (which, honestly, ain’t the best idea if you expect the list to change or if you need more details about each country), or you can grab it from an external source. There’s plenty of readily available JSON files out there with all the countries and their codes, or you might even find a full Javascript library. Choosing the external source is the better method.
Once you got your data, the magic begins. Your Javascript code will read this data and then dynamically create the `<select>` element (that’s the dropdown box itself) and a bunch of `<option>` elements (each one representing a country). You’ll loop through your country data, creating an `<option>` for each one, setting its `value` attribute to the country code (like “US” for United States) and its text content to the country name (like “United States”).
After that, you just gotta append all those `<option>` elements to your `<select>` element, and then append the whole `<select>` element to the right place in your HTML. And boom! You got yourself a country dropdown list. You’ll probably want to add a little bit of CSS to make it look nice, too. Let’s not forget those styles, now.
Now, here’s a little somethin’ extra. Think about adding an “onChange” event listener to your `<select>` element. This will allow you to run some Javascript code whenever the user selects a different country. Maybe you want to update a state/province dropdown list based on the selected country, or maybe you want to display some extra information. The possibilities are endless. A user selecting their state after selecting their country.
Keep in mind, though, that doing everything in Javascript can get a little messy if you start adding a lot of extra features. If you need to handle complex logic or if you want to integrate with a backend system, you might want to consider using a framework or library like React, Angular, or Vue.js. This is a good alternative, you just have to remember what you are doing.
Country Dropdown in WordPress Forms: The Easy Route


Now, if you’re runnin’ a WordPress site, chances are you use forms. Contact forms, order forms, signup forms, you name it. And if you need a country dropdown list in your WordPress forms, there’s an easy way to do it without writing a single line of code. I’m talkin’ plugins, baby!
There are tons of WordPress form plugins out there that come with built-in country dropdown list functionality. Some popular options include WPForms, Gravity Forms, and Contact Form 7 (though you might need an extra plugin for Contact Form 7). These plugins usually have a drag-and-drop interface that makes it super easy to add a country field to your form. You just select the “Country” field type, drag it onto your form, and you’re good to go. The plugin handles all the heavy lifting behind the scenes.
Now, some of these plugins also let you customize the country list. Maybe you only want to show a few specific countries, or maybe you want to change the order of the countries. Some plugins even let you add a search bar to the dropdown list, which is super helpful if you have a lot of countries to choose from. That’s the beauty of the situation.
One of the biggest advantages of using a WordPress form plugin is that it integrates seamlessly with the rest of your WordPress site. You can easily connect your form to your email marketing service, your CRM, or any other third-party tool. Plus, you get all the other benefits of using a form plugin, like spam protection, data validation, and easy form submission management.
But here’s the thing: not all WordPress form plugins are created equal. Some are more user-friendly than others, some have more features, and some are more affordable. So, before you choose a plugin, make sure to do your research and read some reviews. Find one that fits your specific needs and budget.
Also, remember that even with a plugin, you might still need to do a little bit of customization to get the country dropdown list looking exactly the way you want. You might need to tweak the CSS to match your website’s design, or you might need to add some custom Javascript to handle specific form interactions. But don’t worry, there’s plenty of documentation and tutorials out there to help you out.
So, there you have it. Two ways to add a country dropdown list to your website: the Javascript way and the WordPress way. Which one you choose depends on your specific needs and technical skills. If you’re comfortable with code, Javascript gives you more flexibility and control. But if you want the easy route, a WordPress form plugin is the way to go.
No matter which method you choose, remember to test your country dropdown list thoroughly. Make sure it works correctly on all devices and browsers, and that the data is being submitted correctly. And most importantly, make sure it’s easy for your users to find and use. After all, the whole point is to make their lives easier, not harder.
So, go forth and create some beautiful, functional country dropdown lists! And remember, keep it simple, keep it clean, and keep it user-friendly. Peace out!
If you are looking for Create Country & State Dropdown List in Javascript – Countries.js you’ve came to the right page. We have 5 Images about Create Country & State Dropdown List in Javascript – Countries.js like Country & State Dropdown List – Web Development, Country & State Dropdown List – Web Development and also GitHub – TomDrapes/country-dropdown. Here it is:
Create Country & State Dropdown List In Javascript – Countries.js
frontendscript.com
country list dropdown javascript state countries create js april input text category names lists
GitHub – TomDrapes/country-dropdown


github.com
How To Add A Country Dropdown List To Your WordPress Forms (The Easy Way)
wpforms.com
dropdown forms wrong wpforms
Country & State Dropdown List – Web Development
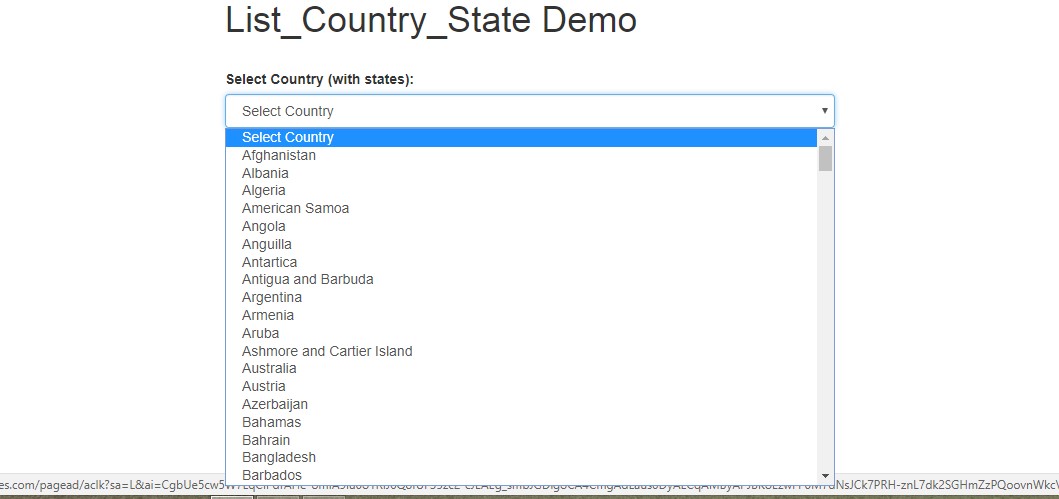

webdevpuneet.com
Country & State Dropdown List – Web Development


webdevpuneet.com
Country & state dropdown list. Create country & state dropdown list in javascript. Country & state dropdown list
Gallery for dropdown country list Country & state dropdown list


